Zeagle Express Tech Deluxe BCD Review

This is probably one of the most difficult bcd’s to categorize, it is a back inflate, soft backplate style, travel bcd. It is lightweight, customizable, and one size fits all, the only downside to this bcd is its minimal lift capacity. Zeagle is well known for their durable and reliable bcd’s that are used for both recreation and a favorite of the military. The most recognized bcd from eagle is the Ranger, and the least recognized is probably the Express Tech. This bcd can come in multiple forms depending on how many bells and whistles you want it to have. The most basic is the Express Tech and then you also have the complete package with the Express Tech Deluxe. Depending on what you are looking for in a bcd this may be the perfect fit.

The Basic stats of this BCD are as follows:

  • Dry weight is 6.5 lbs
  • Lift capacity 24 lbs
  • Rear Weight pockets (16lbs)
  • Soft back plate
  • Twin tank straps
  • Optional shoulder and back pads
  • Optional quick release pockets (2 options: Zip Touch 20 lb, and rip chord 30 lb)
  • 5 d-rings
  • One size fits all
  • Zeagle’s quick unscrew inflator hose (compatible with garden hose for flushing bladder)
  • Starting Price $394.95
  • Replaceable Bladder
  • Can be set up for twin tanks

What I like about this BCD:

In my mind this is almost a perfect BCD it has pretty much everything I want for an all around BCD and nothing I don’t. Especially for my personal style of diving. It is one size fits all using webbing that can be trimmed, and a stomach strap that is connected to the shoulders with slide so it easily adjust unlike some backplates where the shoulders are almost static. This means I can dive with this bcd in a 3mm suit for warm water or a Drysuit for cold water without having to make any major adjustments to the BCD. The optional quick release pockets and pads let the user decide if the extra comforts are worth the cost. And by far the cost of the BCD may be its most attractive coming in under $400 for a travel bcd is hard to find, and though it may be a tad heavier than others on the market 6 lbs is nothing to shake a stick at.

What I don’t like about this BCD:

There isn’t much that really is a deal breaker for this bcd in my opinion, the only things that I can understand might be undesirable would be the minimal lift capacity and the additional cost of add-ons. The lift only being 24 lbs really dose make this BCD best suited for warm water divers, I do find it silly that with only 24lbs of lift they give the option to accommodate 46 lbs of lead in the front and rear weight pockets. I it is probably possible to attach a larger bladder but have not looked into the difficulty of doing so, and of course the larger bladder would be sold separately. I would prefer the bladder to have a little more lift 30+ lbs would make me much happier than the 24 lbs but it wouldn’t deter me. The added cost of extras on this bcd i wouldn’t categorize as a bad thing obviously more features cost more but I think some will get the basic Express Tech and be put off that it doesn’t have quick release pockets on the front or padding for the shoulders or back. The price is very desirable for what you are getting $394.95 for the basic and the price jumps from there with the weight pockets and pads pushing the price over $500.

Overall if you are looking for a lightweight durable BCD, that you want to customize to fit you and your diving style the Express Tech may be the perfect fit. I have only dove this bcd a few times borrowing from a friend, I enjoyed the fit, it was easy to put on and take off with the stomach strap connected to the shoulders. Diving it with my drysuit the lift wasn’t an issue I usually only use the BCD at at the surface anyways. It will definitely be my next purchase and become my dedicated travel bcd because although my Stiletto is great shedding a few pounds for other gear can make a big difference.

Tips for Finding the Perfect Fins

For diving fins are an integral part of how we move around underwater they are one of the most efficient ways to propel ourselves with all of our gear on. While there is no perfect science for finding fins this will cover some considerations in determining which fins will best suit your diving style. This will be more handy for divers looking for their first set of fins but could also be helpful for divers looking to replace an old pair of fins.

First consideration: full foot or open heel?

Full foot fins are generally regarded as snorkeling fins but are often used as diving fins for warm water. They are usually a bit smaller than traditional fins, use a full foot pocket with heel, and usually are a bit lighter and cheaper than open heel fins. These are a good option for someone who only plans on doing warm water diving, they will not keep your feet warm enough for cold water diving. The sizing for these fins usually is a range of shoe sizes (7-8, 9-10, 11-12 etc…) this will vary with each brand.

Open heel fins are just what they sound like they have a foot pocket with no heel and a strap to keep the foot secure. These fins are almost always used with booties. They are generally a little bit more robust in the blade and the foot pocket to accommodate the boot, and can cost a little more. The open heel fin is the ideal fin for diving because of its versatility, despite the extra weight can be used in warm or cold water by going to a thinner or thicker boot, feet are also something that we need to worry about overheating while diving so wearing a thick boot in warm water isn’t an issue, except for travel weight. Open heel fins can also have a variety of different straps for the heel ranging from rubber or silicone adjustable with clips for quick disconnect, to silicone, bungee, or spring straps that are usually at a set tension and used for easy removal. This can effect the cost of the fin but can also usually be changed so if you would like to upgrade to spring style straps that is possible. The sizes of the open heel fins is much more general usually ranging from XS to XL but with the adjustable strap or spring strap able to accommodate a wider variety of foot sizes.

Second Consideration: Comfort.

What you want to avoid when buying fins.

This is the most import step in finding the right fin, comfort should be your primary objective because if its not it will make the experience unbearable like going on a hike in dress shoes. Depending on which style of fin you decide to go with you will be next trying them on, if you are getting an open heel you will need to find a comfortable bootie first. For the full foot fins you want to make sure that when in the pocket your foot is secure and not shifting around, too much space could lead to rub spots that cause blisters. You also don’t want the foot pocket too tight because it may cause cramping in the foot. Consider trying out different brands if possible because their foot pockets and ranges of sizes will differ. For open heel fins it will be a very similar process you want to try on different sizes and make sure that the bootie fills the entire pocket you should not have any gaps when worn, gaps can cause the fin to move and shift on the foot and work less efficiently. For people with small feet make sure that the heel strap is not completely maxed out, sometimes this can still not be enough and the fin can fall off under heavy kicking. Check and make sure that the foot is not experiencing and squeezes or pressure points from the pockets these can become uncomfortable and possibly cause cramping, sometimes due to the heel strap being to tight. For both the full foot and the open heel make sure to extend the leg and kick with the toes pointed to replicate the position your foot will been in while diving this will be a more accurate portrayal of how the fin will feel. Consult with the sales person if you are having trouble determining if it is a good fit, but ultimately you will feel if it is comfortable or not.

Third Consideration: soft or stiff blade?

The softness or stiffness of the fin blade will differ from style to style and most brands will have a range to accommodate all styles of divers. Soft blades have a lot of flex to them and are much easier to kick but do not provide a great deal of power. With the soft blade it will not be as obvious that you are kicking a fin and will feel like a more fluid motion. Softer blades are most efficient with the flutter style kick. These are generally popular with newer divers, divers with injuries, or divers that may not have the best kicking form because they are more forgiving and require less strain. Stiff blades will provide more resistance when kicking and have increased power to the kicks, you will be aware that you are kicking. These fins can be a little heavier and sometimes shorter, becoming very popular in the technical diving space because of the ability to maneuver and push a diver with more equipment. These blades work best with some form of frog kick, but can be efficient when the flutter kick is used as well. This fin is best for divers that are used to kicking and have stronger legs and a good kicking form to maximize their efficiency. There are also a variety of fins in-between soft and stiff, like stated before focus on comfort first if you are a new diver whatever you start with will become your normal.

For divers replacing an old pair of fins, I generally suggest sticking with a fin that is roughly the same stiffness or softness as the last pair. If you have been diving that fin for a while it will be an awkward transition going from soft to stiff and vise versa. If you have not been diving in a while and don’t remember how soft or stiff your fins may have been it shouldn’t matter that much.

Split fins: these are fins that are just what they sound like split down the middle of the fin leaving two fins instead of a single blade per foot. The split fin is very efficient in how they work channeling the water straight back on both the up and down kick. A majority of the time the split fin is a very soft fin, ideal for divers that may have a injury that could affect their kick. While very popular for a while new fin designs have found ways to maximize efficiency of the fin with out the split, so they are becoming less common.

Fourth Consideration: Color.

Like all other dive equipment most fins will come in a variety of colors to allow divers to personalize their gear. The color of the fin will not affect its performance, so in reality it doesn’t matter but some divers will choose a particular set of fins over another because of the color option. I recommend agains this but if you need to match your gear have at it. Most fins will offer at least the basic 3 colors (black, blue, yellow) but with new styles more colors are becoming popular (teal, pink, purple etc…) Fins are a great way to identify other divers underwater and having a different color will make you more recognizable. Some more tech oriented fins will often only be offered in one color usually black, but many divers will write their names on them to make them identifiable.

Do’s and Don’ts of Diving: Training Edition

Wether you are a brand new diver or a seasoned diver learning a new specialty there are somethings you might do that secretly drive your instructor up the wall. Some of these things may occur before instruction begins, during or after, but at some point these will all happen eventually. Here are some things you might do as a student getting certified that your instructor hates, and how you can avoid or fix these problems.

Don’t show up to class with the generic Costco mask, snorkel & fins set.

Costco Special

Diving isn’t the cheapest sport to get into, but like many other sports there are very very cheap alternatives that just don’t cut the mustard. The mask in those sets are made with cheap materials that will not hold up over time, the silicone is actually silicone & some sort of PVC which will harden relatively quickly. These are also very generic so its very common for them not to fit well or be very uncomfortable. The fins are the worst of the package, they are meant for snorkeling, so they are way to small to efficiently push a diver with gear through the water, and they are made for bare feet so if you are planning on diving with boots in cold water they won’t fit. The straps and clips are also cheap and very prone to breaking. I want to bang my head into a wall ever time I see one of these sets show up to a class, it tells me that this person is either to cheap to commit to diving or they just don’t care about getting certified. I see this a lot with parents getting kids certified or significant others getting their partner certified, they don’t know if they will like it so they don’t want to invest in good gear, but if you don’t have gear that is comfortable and appropriate its more likely they won’t enjoy diving. Obviously this is more of an issue with Open water students than continuing education.

Do get your gear from a dive shop.

Appropriate diving equipment

Firstly preferably get your gear from the shop you are getting your instruction at its just a show of good faith and support, but secondly they will ensure that you have equipment that is appropriate for the type of diving that you are training for. Proper fit and suitability of personal equipment will greatly improve the quality of the experience and make diving way more enjoyable. If you compare diving to something like snow skiing or snowboarding if you show up to a lesson and you don’t have appropriate attire genes and a sweatshirt and its storming out you are going to be miserable and not enjoy the experience despite paying for a lift ticket, lesson and rentals unless you purchased a plastic version of the snowboard or skis at Costco and that won’t work very well either. So make sure that you have the appropriate equipment for diving and that it fits you properly, your dive shop will be happy to help you with this.

Don’t be Late.

This is one of my personal pet peeves, as a very punctual person I hate it when people are excessively late. Classroom, pool and ocean dives are usually set in advance so if you sign up for a class make sure that you can make it to all of the meetings on time. Most of the time there will be other students also waiting for you to arrive so the class can get started. Scuba training is often open ended in terms of time so your being late could drag the class on much longer than people want. Its a sign of respect and commitment to show up on time, and being late affects everyone in the class.

Do call in advance if you are going to be late.

Its a simple courtesy to everyone in the class and instructor if you can let them know you are running late. Depending on how late you might be they may wait or start the class without you so you can make it up later (likely for an additional fee). Sometimes the meeting time might not be during shop hours so it is a good idea if you are starting a class to ask if you can get the instructors contact just in case this will also help if you are having trouble finding a meeting location. Your instructor should have your contact from when you signed up and will likely call you to find out if you are running late or not coming to class. The most important aspect is to make sure that being late to class is not a common occurrence.

Don’t be unprepared for class.

This is something that often contributes to being late to class, maybe you show up on time or a little early but you still need to get all of your equipment for class, this can take anywhere from 30min to an hour and now the class is waiting for you. Some students might also show up and not have read any of the material, or gotten important forms like the medical questionnaire signed by a doctor (if necessary). These are all things that delay the class, and some instructors may ask that you sign up for a different class so you can complete the required material or have time to see your doctor and get medically cleared. This is all information that you are given when signing up on how to be prepared for the first day and it is up to the student to take responsibility.

Do prepare for class in advance.

It sounds simple but many neglect this opportunity, often times scuba classes are signed up for well in advance and the student has plenty of time to get their personal equipment, read the materials and get medically cleared (if necessary). So take the process seriously and your instructor will greatly appreciate it, it will make the class much easier for everyone involved. There is nothing more disappointing than having to reschedule a student because they didn’t take the time to prepare so avoid the situation all together and make sure you are ready for the class well in advance.

Don’t be afraid to ask for additional attention or help.

The purpose of the instructor is to train and assist you in learning to scuba dive, so don’t be afraid to ask for additional help. If there is a skill that you are struggling with and everyone else in the group is getting it the instructor or their assistant will either take you aside to work with you one on one or have you move on to circle back to the skill at the end to keep the flow of the class moving. Its ok to have trouble with the skill especially in the pool it is all new and very unnatural, so if you are having some difficulty let the instructor know and they might have an alternate way to perform the skill that might be easier for you. If you are completing a skill but not feeling comfortable with it, it could cause problems when performing them in the ocean which can be dangerous, so make sure that you are 100% comfortable with all the skills. If you need to arrange additional pool time for practice or a private session with the instructor to make sure you are ready.

Do consider tipping.

This is of course subjective, but if you had a really great instructor that went above and beyond in your training a little something extra is always appreciated. It doesn’t have to be cash it might be a 6 pack of beer, or bottle of wine, a thank you card or even signing up for another class like advanced or a specialty . These things mean a lot to instructors to know that their work is appreciated, surprisingly instructors don’t make that much off the classes, after the shop taking their cut, pool fees, paying assistants your instructor is teaching primarily for for joy of teaching and sharing scuba diving with you. So let them know that you enjoyed the experience leave a positive review, call the shop and let the owner know what a good job they did. Of course if they didn’t don’t but if they did do an amazing job make the effort.

Do’s and Don’t of Diving: Shop Edition

The dive shop is often the first interaction most people have on their journey to becoming divers. For new divers and old diver there are somethings that can drive the staff up the wall weather its a small shop or large shop you are likely to encounter one or multiple of these issues. The goal is to help guide any diver in what to avoid and how to properly act when in a dive shop.

Don’t try to haggle everything.

One of my biggest gripes from working in dive shops is the customer that tries to haggle the price. While I understand that some equipment can get expensive it is not the shop that sets the price a majority of the time. The manufactures of the products set the price and usually have whats known as MAP (minimum advertised price) for their products. This is the lowest we can advertise the price breaking MAP could result in the loss of that brand to the shop. The other thing to keep in mind is that MAP price often doesn’t leave that much room for profit for the shops this is especially true in small shops that can’t buy in volume to reduce their cost on items. Think of it this way when you go clothes shopping or grocery shopping do you ask for additional discounts when you check out.

Do ask if there are similar items that may be in your price range.

A good dive shop will do everything in their power to ensure that you get the best gear for your buck. Many shops and employees are aware of deals and packages that may save you money and allow you to get equipment that fits your budget. That is what the dive shop is for to help support divers, who support dive shops.

Don’t use shops to try on gear to purchase it online.

As sneaky as you think you may be trying on any piece of equipment employees are pretty good at figuring out when your just testing it out before you buy it online, if your taking notes its completely obvious. There is nothing more infuriating than assisting a customer with manny different types and sizes of equipment to have them just walk away never to be seen again. Sometimes this process can take over an hour just for basic gear, mask, booties, fins etc… that employee may have missed out on sales that where missed because they were helping you. While online is a great convenience and some of the larger retailers (Leisure pro, scuba.com, etc…) have great deals, some that your local shop can’t compete with your are just running your local shop out of business. One thing to keep in mind is that these online retailers aren’t going to help when you need your tanks filled or equipment serviced. Your local shop provides an expertise that they should be compensated for when assisting you find your equipment.

Do be upfront about your intentions, or ask if they price match.

While part of this response may come off as a little cold, I think that if you come into a shop and try on equipment to buy it online then the sales staff shouldn’t have to put any effort into helping you more than they have to. Some shops if the price online is reasonable will match the price. This may be more common in larger shops where they can make up for the discount in volume but small shops it may not be as common. If the difference in price is too great they may not be able to accommodate you. But once again this goes back to weather or not you want to support your local dive shop. If you buy equipment that needs to fit properly online you should have to deal with the repercussions of gambling on weather it is going to fit or not instead of wasting a dive shops time.

Don’t try to sell us your (your friends/family members) crusty old equipment.

A majority of the time equipment that has been sitting for many years in a garage or closet has very little value in general, and nearly no value to dive shops. It takes up space and most likely needs to be serviced especially tanks, bcd’s and regulators. While you may think that the new ones are expensive so yours should be worth a lot, it isn’t especially in the condition its in. One of my least favorite interactions is when someone brings in something they are trying to sell, I tell them we are not interested and they tell me they want to sell in on craigslit/ebay and want to know what a new one is worth so they can price theirs the same. You wouldn’t try to sell a old car for the same price as a brand new one would you, why would it work with dive equipment.

Do ask what options you have with your old equipment.

I understand that as divers we accumulate stuff and sometimes we need to clean house, this is were a shop may be able to help. Depending on what you want you usually have options depending on the condition of the equipment. If you just want to get rid of it the shop can take it as a donation and repurpose it or refurbish it. If you want money for it and its in good condition they may offer to sell it on consignment (not very common unless its in really good condtion). If you want money and its not in great condition take the shops advice on what it is worth and try craigslist or eBay. If you are looking to replace it with new gear ask if they have any trade in programs, some brands like Oceanic will take old and non functioning equipment and provide a discount on new equipment in their case it can only be for the same type of equipment BCD for BCD, computer for computer etc…

Don’t buy used gear online.

Despite offering this as a solution for getting rid of gear I am a strong advocate for not purchasing used equipment online especially for new divers. There are some exception for people that may be looking for a very specific piece of equipment that is no longer manufactured and they are very familiar with that piece of equipment. But as appealing as some prices on used gear is online its going to cost you way more in the long run. The people selling these items are trying to get rid of them most likely because they are old and outdated or not working properly. The service fees may cost you more than if you were to just purchase an new one. It is also worth knowing that some regulators are no longer serviceable (Dacor), so this great purchase you just found might as well be a paper weight. The other thing to consider is fit and durability for things like wetsuits and other neoprene items neoprene wares out and new suits use a much better quality neoprene than the old suits had access to.

Consult your Dive shop about used equipment.

Some dive shops sell their used rental gear that has most likely been maintained better than anything found on criagslist/ebay. So if you really need to save money on equipment ask if they have any used gear for sale, of if they sell their rentals (usually at the end of the season). If they don’t sell used gear or rentals, tell them about what you found ask their opinion on it they may help you avoid waiting money on something that seems too good to be true because it usually is.

In the end support your local dive shop, and they will always be there for you when you need them. As online retailers grow and take business from more and more small shops there will always be things that they can’t offer that your local shop can that is the expertise and knowledge that they share with you.

Oceanic Oceanpro BCD Review

The Oceanic Ocean Pro BCD is what would generally be considered as an entry level BCD. This BCD has been in the Oceanic line for quite a while although it may have gone by a few different names, it has largely stayed the same with each new generation adding convenient features. Now the true name of the BCD is the Oceanpro 1000D previous generations also went by just the Oceanpro, and although it was an attempt to break from this mold I also believe that the Cruise BCD was also the same. If you are on a budget or a new diver looking to get your first BCD the Oceanic Oceanpro bcd is a great starting point if your not ready to make the jump to back inflate.

Lets talk about features:

  • This is a jacket style BCD made of denier nylon, which is very common in BCD materials, the great part about this is that if the bcd is punctured it can be patched quite easily with some aqua seal (I have had to do this a few times).
  • It has the standard Oceanic Inflator, right shoulder dump and rear dump, all of these additional dumps have pull strings with balls on the end making them very easy to find even with gloves. The attachments for the dumps are also easy to clean with no tools required to remove them which is something I am always grateful for, especially when a student gets sand in theirs.
  • Oceanic QLR4 Pocket system. This is one the largest differences from other brands which is the quick release weight pocket system. They use a hidden buckle that is behind the pocket to help avoid debris, and a handle that i believe is silicone/plastic to pull and release the system. In my experience with Oceanic BCD’s this is a very reliable system if they are locked in properly and not over loaded beyond their capacity. Because the handles do stick out slightly they can get caught on things like kelp but the buckle system is sturdy enough not to pull free too easily. These pockets can hold up to 10 lbs each for a total of 20 lbs of dumpable weight.
  • Storage pockets: as is common with jacket style BCD’s it has two large zipper pockets with moderate pull tabs that make it fairly accessible, a little harder to access with gloves, but like any other jacket BCD how inflated the bcd is will affect the access and storage in the pockets so be careful putting fragile things in the pockets. But plenty of space for a light, slate, reel, or SMB for those that want to have them but not have them dangling off them.
  • D-rings, the Oceanpro sports 8 plastic d-rings strategically placed for the most convenient use. I have not encountered any broken d-rings they seem to be sturdy, comparing my much older Oceanpro BCD it has much fewer and I find at times not able to clip things were I want, but the new design has plenty of options.
  • Trim Pockets, this bcd like more and more has trim pockets attached to the bladder on the back of the bcd on either side of the tank strap. They each can accommodate 5 lbs for a total of 10 lbs of trim. They are velcro pockets and non dumpable so I suggest being very conservative with the amount of weight you are placing in them, they should not be holding the majority of your weight.
  • Adjustable Cumber bun and stomach strap. One of the things that most divers don’t realize is that the cumber bun and stomach straps on most Oceanic BCD’s are adjustable. This is great for bcd’s in rentals that may need to fit a variety of sized divers. It also allows a new diver to easily customize the fit to their personal needs and avoid overly tight or loose straps. The adjustment is behind the divers back so it is best adjusted before the tank is attached.
  • Adequate lift capacity. So like many jacket style bcd’s and bcd’s in general the lift capacity is going to depend on the size of the bcd. Smaller bcd’s will have less than larger bcd’s, for the Oceanpro this range from xs to xxl is about 20 lbs of lift to 48 lbs of lift. This could be an important factor playing into your choice of diving, I have seen many times that divers do not take into account the lift of their bcd’s and over load them with weight in their integrated pockets, also forgetting the buoyancy of the tank and finding it impossible to stay afloat at the surface. Keep in mind your exposure suit will add buoyancy but if you take your bcd off at the surface it might not stay there. Be sure to check your weight when diving and avoid overweighting yourself.
  • Molded tank cradle/backpack, Most bcd’s will often have some sort of plastic backplate of sorts to give the bcd rigidity and structure for the tank to press up against for securing it. these are light weight usually and often have a handle to make it easier to carry the bcd. On the Oceanpro bcd there is a pad for diver comfort and on the back above the tank strap what I like to call a cheater strap which is used to help set the tank hight when setting it up and an additional strap around the tank valve incase the primary strap comes loose. This is more common in newer bcd’s and a very handy feature for keeping the bcd height on the tank consistent. The base of this cradle is also where the cumber bun and stomach strap are adjusted from.
  • The most important feature of course of any bcd and the one that I believe many care most about is the price the Oceanic Oceanpro BCD comes in at $479.95.

Overall I believe that this is a great starting BCD for any diver, it is a reasonable price, has plenty of features, storage and very durable. It can be easily repaired and does not need any special tools to clean in all of those nooks and crannies that might build up salt or sand over time. I have been dealing with these BCD’s for 10 years and wouldn’t have any other BCD as a rental. I can fix almost any issue, at a dive site, the weight pockets are reliable and don’t come loose like some other brands (I find a lot of lost weight pockets almost never Oceanic). So if you are looking for a starter BCD consider the Oceanic Oceanpro it may surprise you.

BCD Buyers Guide

The BCD (buoyancy compensator device) is usually one of the first big purchases that a diver will make when committing to owning all of their own gear. This will hopefully be a helpful guide into identifying features and making a decision on which BCD will best fit your needs as a diver. The first part will be understanding the differences between different styles of BCD’s, then we will focus on features. One thing we want to realize is that not all BCD’s are created equally and although almost all brands will produce bcd’s that function properly what they are being used for will greatly affect their usefulness.

Lets first get familiar with the different styles of BCD’s, I am going to break them down into 4 main categories that most shops will carry some assortment of. These four BCD styles are Jacket, Back Inflate, Travel, Backplate/ wing & harness. The two styles jacket and back inflate are what would be considered general or all around recreational BCD’s while the travel and Backplate are considered more specialized having a much narrower usage generally.

Jacket Style BCD:

The Jacket style is usually the first BCD that most divers encounter almost universally being used in rentals for dive shops. The get their name because they wrap around you like a jacket and the entirety of the bcd is a bladder. So air will fill the full bcd around the back and front. This is almost always the best budget option (which is why it is used for rentals) simple design and functioning in all environments. The downside to this style of BCD is when in flawed the Jacket tends to squeeze the user, which if adjusted to tightly or sized wrong can be very uncomfortable for the diver. The benefit of this style of BCD is when inflated at the surface it easily keeps the diver head up. This is a great option for divers on a budget or divers that will not be diving as often because they are generally not the most comfortable.

Back Inflate Style BCD:

The back inflate style BCD generally offers all of the same features of the jacket style bcd with a different style of bladder system. This one is exactly what it sounds like the bladder instead of being wrapped around the diver is attached to the back of the harness. This means that there is no squeeze when inflating the BCD. It also will give the diver better positioning in the water while diving because the bladder is oriented on the back around the heaviest object the tank. Divers that are new to the back inflate often complain that at the surface it tends to push you face down, this is true but can be easily remedied by leaning back on the bcd like a recliner. These tend to be more expensive than the jacket style BCD’s and in my opinion worth the money for the increased comfort and fit that is gained with the back inflate style.

Travel Style BCD:

The travel style BCD more often than not will closely resemble a back inflate style but with smaller features. These BCD’s are meant to be light weight for travel, so reduced weight and lift capacity. This is great for warm water destinations where the user is not wearing a thick wetsuit and does not need a great deal of weight. Most of these travel BCD’s will generally weigh from about 4-6 lbs while the standard jacket or back inflate will weigh from 7-10 lbs. So the Travel BCD’s are not well suited for cold water diving. If you are a diver that will only be doing diving while traveling these are great options. Much better quality and comfort than the BCD’s that you might rent while on a trip. They tend to be in-between the prices of a jacket and back inflate style bcd despite being far less material than either.

Backplate/wing & harness style BCD:

The Backplate style BCD is generally focused more towards technical diving but can obviously be used for recreational. They use either a steel or aluminum backplate with nylon webbing for a harness and some kind of rear mounted bladder attached. These types of BCD’s are very customizable usually set up very simply with few bells and whistles for the diver to add on later if they choose. They can be set up for single or double tanks (usually technical divers), with or without weight pockets and the size of the bladder can be exchanged for a larger or smaller one. The benefit of the backplate is the weight, most steel backplates weight about 5-6 lbs meaning divers can remove that much weight from their weight belt or pockets. If you are looking to get into technical diving this is definitely the best option.

Features: This is something that is hard to cover thoroughly because while most BCD’s will have all of these features each company will have their own take on them, the largest differentiators will be the Quick release weight system and the inflator. Beyond those two they are all fairly similar with a few outliers.

Quick Release Weight system: This in my opinion is one of the most important features to be aware of when purchasing a BCD with the exception of the backplate because they will be an optional add on. Almost all new BCD’s will have their own version of this feature and the reliability of these pockets are paramount. the difficult part of this is that the pockets need to be very secure when the diver is diving, the pockets should not come out unprompted, the locking mechanism holding the pockets in place should be secure (thank god they stopped using velcro it wore out so quickly). But the pockets should also not be so secure that they are impossible to release the weights in an emergency. It is a very fine line that I think few brands get right. In my years of diving I have found that there are a few brands that i find their pockets lost on the bottom much more frequently than others, while this could be user error I personally believe it is an inferior quick release mechanism.

Inflator: This is something all modern BCD’s will have and they all function the same there is a corrugated hose attached to the bladder and on the other end there is an inflator that the LP hose attaches to. There are two buttons one to inflate the BCD usually the one closest to the corrugated hose and a second button to release the air usually on or near the end. Each company will have their own little flair to the inflator with colored buttons or different shapes but for the most part they are interchangeable, you can even get generic ones that fit most corrugated hoses. For the most part this should not be a major factor in deciding which BCD to get each brand will have the same inflator on all of their BCD’s no matter the style. With the exception of Aqualung and their i3 system which integrates the inflator into the bcd and uses a switch on the left side to inflate and deflate, personally I am not a fan, to many moving parts to trust and not easily serviced but some divers do like them.

Tank Straps: These are what attach the Tank to the diver and usually use a standard cam buckle system with the exception of a few brands that have a metal pin latch system. BCD’s will usually have 1 or 2 tank straps depending on the brand, the ones with 2 straps generally secure the tank more efficiently preventing it from feeling like its swinging around. The BCD’s that have a single strap will usually have some sort of plastic backplate that the strap grips the tank to reduce this swinging feeling. Oftentimes with travel BCD’s to reduce weight they minimize this plastic plate with a single strap and add a second lightweight velcro strap to secure the tank slightly more. All of these are functional options that serve their purpose if the user secures the tank properly, which the sales staff should assist with if you are unsure.

Trim weight pockets: these are pockets usually on the back of the BCD located on or near the tank straps. They are not quick release pockets so only a small portion of weight should be placed in these to help adjust the divers trim while underwater. these are very popular for back in late BCD’s because all of the buoyancy is on the divers back. Personally I don’t find them useful, some can be removed if attached to the tank strap webbing which is what I generally do. But if you are a diver and you need to add more weight and have maxed out your quick release pockets and refuse to wear a weight belt this may help pack on those last few pounds. With that being said if you are diving maxing out all of your pockets with weights you should either dive a larger bcd with more lift or a weight belt/harness.

D-rings: these are attachment points for accessories they will vary from BCD to BCD and the number you may want or need could vary. The more technical style BCD’s will generally have more or the ability to add more while travel BCDs will be very minimal with only a few. Once again this is not a feature that i would choose a BCD on but to some divers like photographers it is handy to have more places to clip essential items.

The cumber bun: This is where you tend to see a divide between divers, the comber bun is a velcro strap that wraps the bcd around the waist of the user, there is usually a clip around the outside of the bcd as well that keeps the front pockets from dragging or swinging out when inflated (jacket style BCD’s) I personally find that the cumber bun secures the BCD comfortably to my body, while some divers find it unnecessary, it is a personal preference. Most Travel bcd’s and Backplates will not have a cumber bun, while most jackets and back inflates will.

Dump valves: There are multiple dumps on most BCD’s to release air from the bladder, in addition to the dump on the inflator there is also one at the top of the corrugated hose that is attached by a wire to the base and can be pulled on to use. Most non technical BCD’s will have rear dumps near the base of the bladder for when a diver is inverted needing to release air. Some will also have a dump on the right shoulder with a string to release air, if you are looking for option on where to release air depending on your body position pay attention to the dumps. Personally I find the inflator dumps the most useful and rarely use any other unless I am assisting a student that has not released sufficient amount of air.

I hope this has been helpful in guiding any diver to make an informed choice on their BCD.

Things I have learned as a Scuba Instructor

While compared to many instructors out there I am only at the beginning of my diving career, I like to think that I have learned some valuable lessons. Some are very obvious others just make the job a little more enjoyable. I have been diving since 2001 and was fortunate enough to make the transition to dive professional in 2009 as a dive master and 2011 to instructor. At the time of completing my IE (instructor Exams) I had no idea what I would be getting my self into, but just like as a new diver we all continue to grow and learn from others as we continuously evolve as a diver.

One of the first things I learned very quickly is teaching is nothing like the IDC (instructor development course). Like any scuba certification this course is meant to test soon to be instructors for the worst case scenario, the goal is to perfect demonstration of skills and identify and correct skills of students. While these are handy and can be very useful it is worth knowing that every shop/ every instructor has their own take on how a class should be taught. So while you may have passed all the test, it is only proof that you are capable of teaching the skills and knowledge, not that you have any idea how to actually teach. So for new instructors when you find a job at a dive shop or resort, do yourself a favor and take the time to shadow one or multiple other instructors, I know that you want to start making money but you will gain valuable insight into teaching. This is especially important if you are working somewhere different from where you did your training. I completed most of my training including my IDC and IE in the Caribbean, while I live and work in Central California. Very different environments and conditions that flipped everything i learned about teaching on its head, but thanks to a very seasoned instructor I quickly became a very confident instructor in cold water conditions.

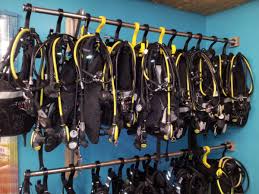
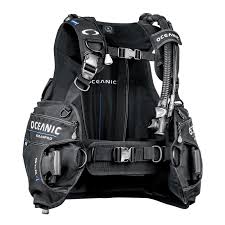
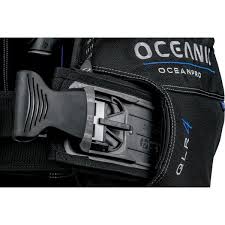
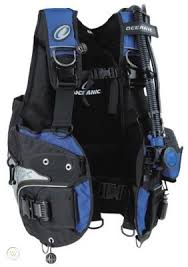
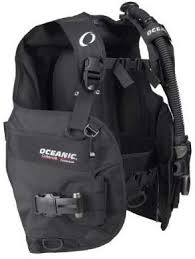
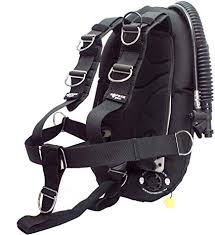
Get a second set of equipment for teaching! This has been a staple that I share with all of my DM’s this second set of gear doesn’t have to be super nice just functional. Why do you want a second set of gear? 1. The chlorine is going to destroy your equipment, especially your bcd, suit/rash guard. My first bcd that I ever purchased eventually became my pool bcd and one day while teaching a class it literally fell apart, many parts had been held together with zip ties up until that point. So if you have nice equipment that you care about don’t constantly use it in the pool, get an old rental bcd that work and use that. Some instructors will just use the shops rentals which is fine but sometimes they take a size that a student needs and then the student is left with ill fitting equipment which I don’t believe is fair to the student. 2. You won’t have to keep switching gear back and forth, if your shop has a dive locker then you can keep your pool gear there and nice gear at home and not have to keep bringing gear back and forth. The less gear i have to shift back and forth between the pool and ocean the less likely I am going to forget something, and nothing feels worse than showing up to an ocean dive and realizing you left your mask at the pool.

Instructors don’t make that much Money. While the cost of getting certified may seem expensive to some people, what most don’t realize is that the instructor only gets a fraction of that amount. Assuming that the class cost lets say $600 that may include materials, rentals, pool fees, then instructors fees. Most of the time instructors are getting paid between $60 -$150 per student (some may pay slightly more some slightly less), keep in mind that classes involve a lot of time invested for instructors. This is why many larger dive shops will pack their classes with as many students as possible to make the class worth the instructors time, and charge so much for private classes. This is definitely not a career that anyone gets rich off of, thats why many instructors will have another career and usually teach as a side job.

Not all shops support the Keyman. If you are not part of the dive industry this may seem like a foreign term, but wether you realize it or not your instructor has a very large influence on you and the equipment they suggest matters, usually. At some dive shops instructors are only contractors that come in to teach and leave when they are done. Other shops usually small ones the instructor may also be the sales person or service tech, and play a much more ingrained roll in the operation. Key man is an industry discount that vendors offer to dive professionals, this allows them to get their gear in front of new students that are looking for recommendations. If you are a new dive professional and working at a new shop they often want you to dive the gear that they carry, this discount is usually what allows dive professionals to afford such nice equipment, despite their average wages. Not all shops offer this to their staff and instead offer their own discount that they can still make money of the equipment sold. While I understand that some shops may not offer this keyman option because every little bit helps a dive shop. I was surprised when I worked at one of the largest dive shops in California that there was no mention of keyman to any of the staff, but I guess they got big somehow and making money of employees is one way to do it.

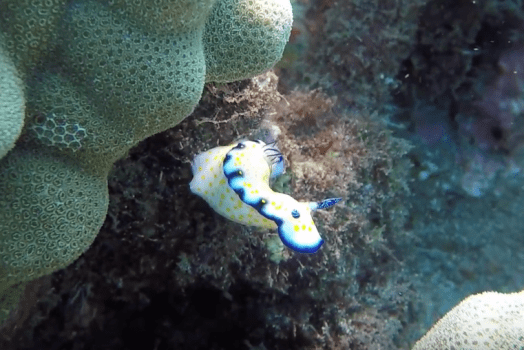
Don’t just dive for work. While this seems obvious, you wouldn’t have become a dive professional if you didn’t enjoy diving, but it is easy especially when starting out to take as many classes as possible and have very little time to dive for enjoyment. You need dives that you don’t have to worry about anyone every once in a while, you will find that the only time you are not in instructor mode is when you are diving with other instructors. If you have dive buddies who are not as experienced you will always look to help improve them, and that is a good thing. You will start to see more teaching moments and gain stories to share with new students to prevent mistakes. But you must also constantly expand your repertoire of dive sites, keep exploring don’t just dive the same site you teach at. If you have access to more sites explore them and grow your exposure, giving new students something to look forward to in diving. This could be destinations or local, although if you can get students excited about local diving they will be your customer for life.

This falls in line with the last point but don’t be afraid to dive with students after they have completed the course. If you have good local diving many students want to go diving again but may not have anyone to dive with. If you are planning on going diving anyways and you are comfortable with them as a diver ( you should be if you certified them) invite them, this will mean the world to them. I understand that this does put you in a roll of supervision but you are providing that new diver with the best training possible, true diving, and no amount of courses can really teach what real diving is. Because i chose to dive with new students eager to dive I have found some of my best dive buddies that eventually became dive professionals themselves.

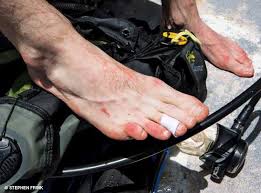
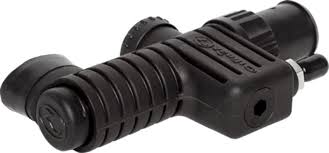
Be prepared for shit to break. The ocean and pools are terrible for dive gear and will eventually cause something to break, be prepared to fix everything every time you set up equipment. it could be a simple o-ring or a stuck inflator, hole in a wetsuit/drysuit, and all of this can lead to miserable diving or missing out on diving all together. So be prepared have a very robust save a dive kit, if you have space bring and extra regulator or hoses. The number of times I have been getting ready to get in the water and a rental bc is auto inflating or not holding air, or regulator is free flowing because it got dragged in the sand, I have lost count. Divers treat equipment that isn’t theirs like shit especially if its their first time using it so be prepared to fix something.

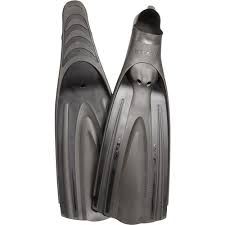
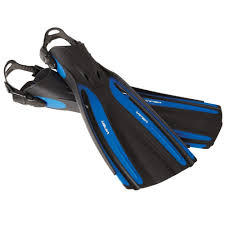
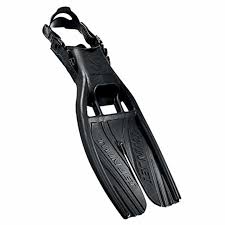
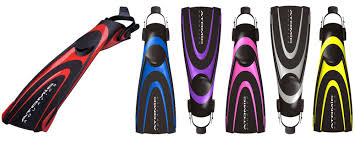
You will make sacrifices as an instructor. Now this may not apply to all instructors but I strongly believe that it is my job to make even the check out dives as enjoyable as possible. So on occasion I have had to trade equipment with a student because a strap broke underwater because its old gear, so i give my fins to the student and dive one fin, or trade masks because they bought a cheap one online and it doesn’t fit. While these are not fun to do and I could have just as easily forced the student to suck it up, I have had plenty of good dives, and one bad dive for a new student may ruin diving for them so I will make the sacrifice. The student may also realize that your gear is way nicer and choose to buy good gear after so its a win win.

Tips are generally regional. Many divers are aware that when you travel to a destination and you dive it is usually customary to tip the crew at the end of the day or trip. This in my experience is not as common at your typical home town dive shop. While I have had customers/students that have tipped after a class it is not very common. If you are a new instructor and starting at a dive shop talk with the other instructors and find out if tipping is common. The truth is if you are a good instructor and your students can tell you care, they will see the value in your instruction. Tips may be helpful financially but the focus should always be creating great divers that you want to go diving with.

For any instructors out there I hope this was helpful if you have any suggestions on things that you have learned as an instructor feel free to share them I will happily add them to the list providing proper credit of course.

Happy Diving, and support your local dive shops/instructors.

Pole Spear Guide

Like any other sport within the realm of a category, pole spears have a wide variety of options, from materials, types of bands, and tips each worth of its own post but to make things simple i will do my best to condense as to save from jumping around. The pole spear is usually a divers first introduction to spearfishing, cost effective and simple, they are easy to use with little instruction and more difficult to injure yourself or others with (but not impossible, be responsible and aware when using one). This is going to be a simple break down of different options for Pole Spears.

Solid or break down? All pole spears will fall into one of these two categories it is either a single solid piece of material or multiple pieces that screw together. Why does this matter? The use of a solid or breakdown pole spear will not be any different, it is the it is the storage and adjustability that makes a difference. Solid pole spears are generally 4ft to 6ft in length (unless specifically for lion fish they are smaller) and are an inexpensive starter option for those that might be on a budget. Once you have made your decision on length you are stuck with it. The breakdown models will often come in 3 pieces giving the user 2 different options for length. This also allows the user to conveniently store the pole spear or pack it away for a trip.

Material:

There are 3 common materials for pole spears: fiberglass, aluminum, and carbon fiber. The material is one of the largest driving factors for the cost of the pole spear, higher end pole spears will often be mostly made of carbon fiber or completely made of it while lower end more entry level pole spears are often made of fiberglass.

  • Fiberglass: This is a inexpensive option for pole spears that generally can be more flexible than the other two. When loaded it is not uncommon to see the shaft flex. Because of the material it is the most likely to snap or break if wedged under a rock or in a crevice. Fiberglass pole spears are offered in solid and breakdown options.
  • Aluminum: This material is in terms of cost relatively close to the fiberglass, still a good entry level option. It is a little more stiff and has more weight behind the shaft that provides a better punching power for penetrating fish. Some of these aluminum pole spears can be hollow which make them more light weight for travel but need to be filled with water to prevent floating up during a shot. Aluminum can be prone to bending if stuck in a hole or crevice but can often be straightened if not to sever. Aluminum pole spears are also offered in solid and breakdown options.
  • Carbon Fiber: This is the most costly of the three materials, but also the strongest. These are almost exclusively offered in the break down option and provide a reliable, stiff shaft with enough weight to withstand the loading and impact of spearfishing. For many pole spear purist these are the best option.

Tips may be the most important part of the pole spear because they are what punctures the fish and ideally hold it onto the spear. There are dozens of different types of tips to choose from with manufactures often putting their own twist on a particular style but to keep it simple i am going to break it down into 4 different tip styles: Paralyzer, trident, rock tip, and the slip tip.

  • Paralyzer: this is one of the most common and iconic tips for pole spears. It generally consist of 3 tines set up in a circular fashion equal distance from the center point usually with barbs on the end of these tines. Paralyzers can also have more than 3 tines in some cases up to 6 or more. The purpose of this design is to increase the number of points that penetrate the fish the more points of contact the more likely to keep the fish from getting off. With this design the barbs are generally pretty small and to best ensure that the fish does not get off after shooting it you will want to pin the fish to the bottom or rock to keep it from sliding off or keeping forward pressure bring it to the surface and grab the end of the tip using your hand to keep the fish from coming off. Many pole spears will come standard with some sort of paralyzer tip.
  • Trident: this is a more old school design that is exactly what it sounds like a trident tip multiple tines, usually 3 or 5 in parallel with barbs on some or all of the tines. This design works under the same principles as the paralyzer tip but does provide a uniform line to aim the pole spear with ( I like to have it vertical and aim right behind the gill plate).
  • Rock Tip: This is the same kind of tip that most spearguns use, it has a cylindrical point with one or two floppers/wings to hold the fish in place once it has been shot. This is a much more secure way to keep the fish from getting off but because it is a single point and much larger of a diameter than the tines of the other two tips it takes more power to penetrate the fish and better aim. This is a better option for a more seasoned spearfisherman.
  • Slip Tip: The slip tip is also something that is more common on spearguns, like the rock tip it has a single point that is meant to penetrate the fish but is attached to the shaft with a dyneema line or braided wire. this is intended usually for larger game fish that may fight and bend/damage the shaft under normal circumstances. These are the pricier of all the tips some costing over $100, they do generally have a smaller diameter than the typical rock tip and a long shaft that extends the tip usually at least 12 in. These are often for a very specific type of spearfishing and are something that if you need it you know you need it.

Bands are what give the pole spear energy and momentum under water. Most of the time the bands are significantly smaller than your typical speargun bans because the energy is not being held for extended periods of time because the user is physically holding the bands at tension. Most bands will be attached to the butt of the pole spear commonly through a hole that the band is looped through with a chord. Depending on the brand they may use a slightly different method of attaching the band but the principle is the same. The band is stretched with the hand up the shaft of the pole spear and held in place by the user until ready to fire. Most of the time the thickness of this band will be around 3/8ths of an inch compared to your standard 5/8th or 9/16th bands for spearguns.

There is one more style of band that is growing in popularity which is the Roller. This once again follows the same premises of the roller spearguns where the band is attached on the body of the the shaft and uses a pulley at the base to maximize the energy usage of the spear instead of pulling to slack like the traditional set up the band is pulled back all the way to the base of the shaft. This is definitely an interesting innovation in pole spear design that I view as more ideal for more blue water big game hunters that need the increased penetrating power.

Thank you and I hope this was helpful. Happy Hunting.